
Cricut® Maker
You have to use the Design Space® to control the machine.
You must place the material on a Cricut® Cutting Mat (they are sticky so the material stays—make sure you replace the cover sheet when you’re done)
Connection: The Machine can be connected via Bluetooth or by USB cord.
Cuttable Size:
11.5” x 11.5” with 12” x 12” Cutting Mat Size
11.5” x 23.5” with 12” x 24” Cutting Mat Size
Cricut Design Space®
Cricut Design Space® is the browser-based design software used to control the Cricut® cutter.
Each user needs to create their own (free) account (sign-in & password)
Software needs to be installed on the computer (already installed on the Design Center computer)
NOT required to use for Mug Press or Easy Press unless you are cutting material.
Making Stickers
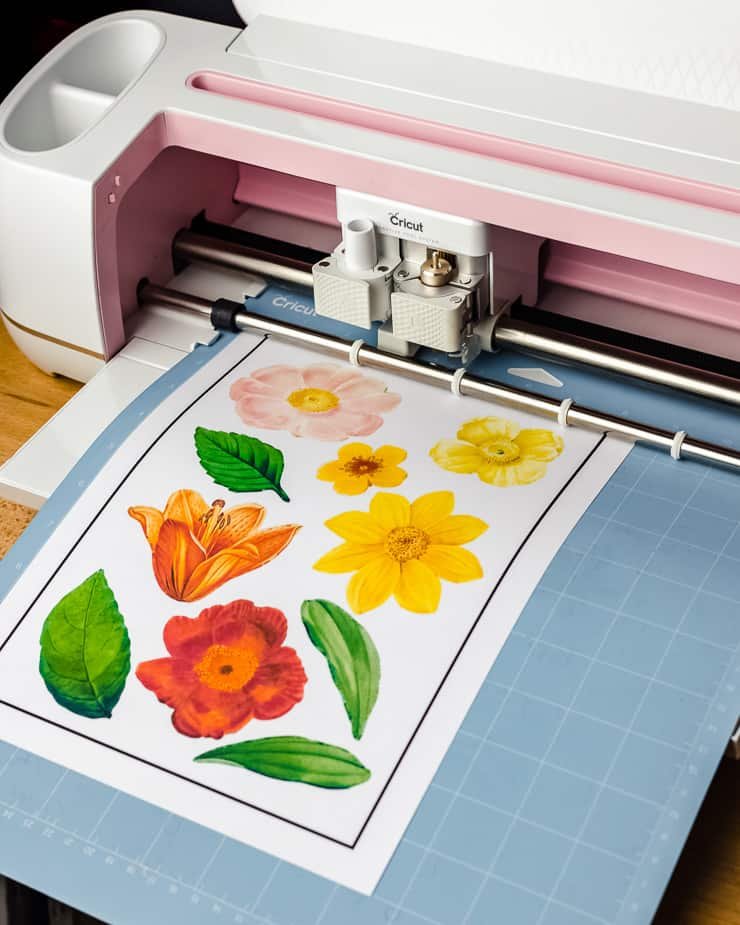
Print & Cut Size:
9.25” x 6.75” Maximum usable space on 8.5” x 11” sticker sheet
This is smaller because the machine prints a black rectangle around graphics for registration (informs it to know where to cut)
Export your graphic (individually) as a PNG
Add an offset shape in background if you want to define your cut line.
Export with a Transparent Background.
Export as a larger file and then resize it in the Design Space if you are concerned with image quality.
Log in to the Cricut Design Space (create your own credentials)
Select New Project
Select Upload
Upload the PNG file into the Design Space.Follow the instructions to remove any background area (if needed)
Select Print & Cut
Resize the graphic to the size you’d like.
Repeat these steps for multiple graphics, or copy and paste the same graphic to create multiple copies.
You do not need to arrange the graphics a certain way on the canvas—Cricut will automatically space the graphics so that you can get the most out of the material.
Select Make It when you’re ready to make the stickers.
You will be using a 12” x 12” Mat
Follow the instructions, it will provide a preview of the number of materials you will be printing (how many pages)
Select Continue if it looks right to you. If you want to edit it, choose Cancel.
Turn on the Cricut Machine.
Connection: You need to make sure the computer is connected to the machine via Bluetooth or USB—if it is having difficulty connecting via Bluetooth you need to use the USB cord available in the drawer.
Make sure there is at least 11” of space behind the machine to allow the mat to move freely.
Select Send To Printer
Select Use System Dialog
This will let you see the typical Print Preview window and choose the Ricoh Printer to print.
The Printer Settings Window will show up behind the Cricut Design Space window, so you have to move it!
You must choose the Bypass Tray/Manual for Paper Feed
Load the sticker paper Face down in the Bypass Tray to print.
Place the sticker sheet on the Light Grip or Regular Grip Mat.
Rub it down and make sure it is secure (no corners turning up)
Alight the sheet to the top left corner
Select Continue in Cricut Design Space
Select the Printable Sticker material
Feed the mat into the machine from the front.
Select the Arrow button when it starts flashing.
Select the C button when it starts flashing.
The machine will feed the mat in and begin the process.Pause: Select the Arrow button to pause the machine.
Cancel: Select the C button after the Arrow button to cancel the job.
Cutting Vinyl
Make sure you have the material backing facing the mat (so you’re looking at the right side)
Follow instructions on how to have the material cut.
You have to “weed” out the excess material using the tweezers—be gentle.
Some materials are harder to cut/weed than others (metallics are thin and delicate)
Cut Transfer Tape to be the approximate (larger) size of your cut graphic.
Apply the Transfer Tape (clear plastic roll with red lines on it) to the graphic area that remains.
Burnish the Transfer Tape onto the cut vinyl (rub firmly with fabric tipped scraper) so that the masking material adheres to the vinyl enough that it will pull it off of the cutting mat.
Gently pull the Transfer Tape and it should remove the cut vinyl off of the mat.
Apply the graphic to your final material (shirt, etc.) and burnish the graphic area (with fabric tipped scraper) until the vinyl has adhered to the surface.
Gently remove the Transfer Tape.

Weed the material that you don’t need using the supplied pick and tweezers.
Transfer Tape is Used to transfer the cut vinyl to the final surface.